Friday, November 29, 2013

My fourth batch of Beer documented.

so last Wednesday I went into The Cleveland Brew Shop (http://clevelandbrewshop.com/) and picked up a American Amber Ale. Ive made 3 batches previous to this one and wanted something light and easily drinkable. The Amber Ale fit the bill.


Here is the list of stuff I use for every Beer batch. 


(A) 5 gallon Stainless Steel Boil pot with lid. 
(B) Thermometer 12 inch 
(C) Home made wort Chiller 3/8inch ID copper tubing 20 foot long with 20 foot clear tubing 
(D) Blow off tube, regular plastic tube that fits in grommet of Fermenting Bucket Top (Item E)
(E) 7.9 gallon fermenting bucket (no spigot)
(F) Extra long plastic spoon
(G) Sanitizer solution (Sparkle Brite 2 lbs) 
(H) Awesome stainless steel Measuring spoons I overpaid for but love (Bed Bath and Beyond) finding a 1/8 tsp spoon is hard for some reason
(I) Funnel (with a removable screen)
(J) 1 gallon glass jug
(K) Wine thief that doubles as a Hydrometer sight glass
( L) Hydrometer to measure specific gravity. Pro tip if you are a first timer.) They are cheap buy two you will break it if you breathe on it wrong.)

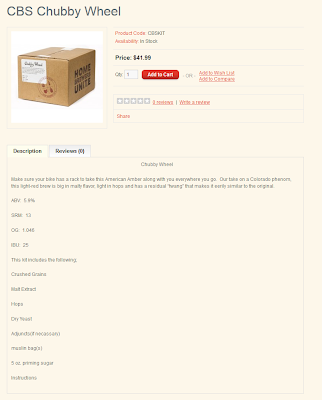
The Kit I was working with is Cleveland Brew Shop "Chubby Wheel" It is a part grain part extract American Amber Ale. 


Link to Cleveland Brew Shop Chubby Wheel
Here is the insides of the kit. I have already put the grains in the muslin bag and they are in the box ready to be put in the water. 


First step is sanitation. I use Sparkle Brite which I learned from wine-making. It is something you will want to wash off after sanitizing. It is some bad stuff not as simple as Star-San but I like it. I haven't had any sanitation issues since I started in wine-making and beer making. It works it is cost efficient as well. Do sanitation however you want but do it well. 

1 TSP gets added to a 1 gallon jug of hot water. 

I add the Sparkle Brite then fill the jug up to the top with hot water and shake until the grains are gone. I put this into the fermentation bucket and wash that down with a beer making only sponge. I do the same with all the tools I use for the beer making process. Then I hit it with the kitchen sprayer and clean it off. When I run out I might switch to Star San but I have a ton of this stuff left and it works pretty well from what I have seen. 

Next up per the kit is 2 gallons of water to 150 degrees. It gets there pretty fast and buying that foot long thermometer is worth every penny as you can see here. 


When it hits 155 turn off the heat and drop the grain bag in.


As per the directions I get a hot pot of water and drop the extracts into them when I drop the grain bag in the kettle. It makes the extract flow better. I still wind up using a sterlized spatula to pull the grain out of the container at the end.

After the grains steep for 30 minutes you take one gallon and pour it over the grain bag elevated over the pot. You are then left with 3 gallons of wort in the brew kettle.


next up the boil. get it to 212 degrees F and you will get a nice rolling boil. 

Add the extracts that you had in the pot of hot water. 

Next I divide up the hops according to the Hops schedule. 

Add the hop according to the schedule. 


I have a whiteboard behind my stove so it make a convenient place for notes.  


After the boil it is time to chill it down to below 70 degrees. The faster you do this the better. I made a homemade wort chiller which honestly works fast enough. Ive used this 3 times and each time it never took more than 8 minutes to chill the wort. All this wort chiller is is 3/8 inch copper tubing that is 20 foot long. The design is simple with a tubing bender. 


Overhead shot of it already way lower than 212 degrees just from putting the wort chiller in. 


No need to waste the water. Already pre-heated water easily pours right ito the hot tub. Since the water is in a sealed wort chiller the water is perfectly clean. 


 With it being in the 20s outside you can see the time stamp on the pictures. It took 5 minutes 40 seconds to chill the wort from a boil to sub 70 degrees. If the magic number was 30 minutes to cool the wort, this system is close to perfect. 

From here I put the wort into the fermenter, ripped open the yeast packet and closed the lid tightly. 

I didnt take a picture of it yet (I will update when I do) 

I took the blow off tube and put it in the lid of the bucket and then took the other end and stuck it in that gallon jug of sanitizer from before. 

It looks something like this. 


 That tubing IS going to get brown foam and it will go into the water. This is to be expected and is perfectly normal. 

You are now done for 2 weeks.  Put it somewhere so it can be at room temperature 65-75 and let it sit. Fermentation should start in about 12 hours and be VERY active for about 3 days. 


Tuesday, November 26, 2013

Want to live in the Greater Cleveland area? 

Check out snowfall maps. Extremely relevant for this time of year. 


I live in the 50-60 inches area and that is almost enough for me. 

Saturday, June 22, 2013

West Park Radio Ops 2013 
W8VM Field Day is live and 2A in Ohio


Monday, May 27, 2013

Another addition to my shack from MFJ

The Actual MFJ-929 sitting on top my Yaesu FT-840

So I went to Dayton Hamvention this year in search of an Autotuner. I was loaned a LDG AT-11MP version 1.0 from my long time friend and Elmer Bill (KA8VIT) I fell in love with autotuning.

and I know my buddy bill "Loves spinning knobs but I am really not a big fan. Bill's AT-11mp is great tuner. 

 LDG AT-11MP Version 1.0

But it is the 1.0 version. There is no more upgrade chips for the AT-11MP anywhere. I contacted LDG I contacted 3 different web referenced locations that used to have the upgrade kit and no one has it anymore. Too bad really. It is a great tuner. Having it have memories (the 1.0 version doesnt have any memory) and knowing that the upgrade gave it faster tuning made it a non starter for me. It also kind of soured me that LDG didnt carry that upgrade anymore. I know I know is that reasonable to think that a product 10+ years old needs to have an upgrade to it? I dont know this is Amateur Radio and I guess I have strange expectations. 

Anyhow I started off my quest and looked at the LDG product line. The immediate winner was LDG AT-100ProII. I wasnt going to buy one used (Amateur Radio used prices really dont make it worthwhile) I was looking for brand new. Retail price looked to be 199 before shipping and the BEST price I could find was on Cheapham for 186.00 of course there was going to be 10-20 for shipping. So I put it off until Dayton. I am going ANYHOW so why not pick it up there? Anyhow so I am at Dayton and camping at Buck Creek State park the day before. I just on a whim start looking for prices for the AT-100 Pro II. I still see the best price is 186. So I write that down so I can look tommorrow. I also looked at MFJ. I dont know why I did but I just did and then I found the MFJ-929. I was completely surprised. 

The MFJ was retail price 219. So right off the bat it was comparable to the LDG AT-100PRoII. Here is where it got interesting. The MFJ-929 is rated to 200 watts instead of 100-125 watts. What is the difference? Not much but it is nice to have that little bump in capacity. I dont ever think I will ever use more than 100 watts. I get done what I need to with 100 watts so, right now? Why bother? The list of features went on and on. More memories on every band. Handles random wire (little did I know this would become pointless in another day) It has a BIG LCD display on the front of it. It handles 2 antennas. It is a small attractive case! It is still MFJ however. I cant get that "Mighty Fine Junk" saying out of my head. I wrote the model down and wrote the retail price down too 219.00. I still was going to get the LDG but I figured I would have that for comparison. 

I set upon Hamvention with that in the back of my mind as my target. I did the whole walk through the outside vendor area and really didnt find anything I needed. I got bored with outside really fast. Aisles and Aisle of junk that should be in a landfill. I probably only looked down about 1/3 the outside flea market this year. I also scoured inside. I visited the MFJ booth. No specials there. I saw the tuner right there for 219.99 full retail price. No deals to be had at Hamvention. I looked at a few other familiar big retailers in the inside areas. Nothing. A lot of people said "We dont have any here in stock". I was about to leave for the day after scouring the inside vendors when I walked around a corner and saw something on a table. It was the MFJ-929 on the table of Ham World Inc. 


It was the only item on the table without a price. Here was that cool tuner. I picked it up and looked at it. Light, well made. Interesting looking. Ok, give it a try here. 

"Is this for sale?" 

"Sure is..." 

"Ok, what is the cash price" 

J.T. (N4ZDY) checks his list and comes back with a price almost instantly. "$175" he says. 

Look, I can play poker pretty well and some stuff can shock me and I can have a deadpan look on my face. I felt this though. My eyes popped out of my head. I launched into my pocket for my money clip. 

"Yeah, that is a pretty good price. I know" 

I guessed at this point he knew my face was excited. I grabbed my 200 and handed it over without even looking. 5 minutes later it was in my backpack which was strapped to my son.

In my haste I stated to doubt myself. 175... did I buy the RIGHT thing? I am not sure how many of you had that problem where you bought something QUICK that was a good price and it wound up being not what you thought? It hasnt struck me in a long time but I can remember about twice where that happen before. I opened up the backpack and saw the box. I put it in perfectly so the label was up. 


200 Watts - CHECK!
1.8 to 30 MHZ -- that is 160m to....wait where does 10m end? 28Hmz..(yeah I know I got a extra class license I shouldnt have to think this much about it. --- CHECK!

ok.. whew.. I bought the right thing.. 

That was a hell of a deal. I couldnt touch that anywhere online for that price. This is a relatively new tuner and it REALLY matches where I operate. 

Anyhow I get it back to the campsite and hook it up immediately. 

Then I stop. Ok electronic parts.. sort of expensive. Get a cup of coffee and get the manual out. 

There was a quick start guide in the manual so of course I read that. I was also ready to apply power to it. 

It fires to life and wow. 

I check all the antenna coax and key down on AM at about 5w. 

Bzzzttt boom 1.0 SWR. That was like seriously one second. Increased the power. The bar graph incremented right to where I would think the output should be. 

So I have about a week into this tuner and I love it. It had the classic MFJ problem. There was a screw that didnt fit in the hole and it was sideways. I was able to remove ALL the screws and manipulate the case so it
lined up better and I put the little metal screw back in. It looks fine. 

 The screw after being removed and lined back up. 
The customary MFJ new out of the box repair job.You do it once and then it lasts another 20 years


It works great too. Ive had no problems with the tuner for the past week. I have operated it off 12v battery power with my rig. Ive seen it where I have had some bad RF operating portable. I have defaulted it twice when moving the antenna. I didnt need to. It has memory banks for recording many different antenna configs. The tuner is so nice and fast. Who cares about all the memory locations and different ones PER antenna. Maybe someday that will come in handy.

 TL:DR I was about to buy a LDG AT-100ProII but I found a MFJ-929 for a great price. I love it and would recommend it to anyone who regularly runs 100 watts.