so last Wednesday I went into The Cleveland Brew Shop (http://clevelandbrewshop.com/) and picked up a American Amber Ale. Ive made 3 batches previous to this one and wanted something light and easily drinkable. The Amber Ale fit the bill.
Here is the list of stuff I use for every Beer batch.
(A) 5 gallon Stainless Steel Boil pot with lid.
(B) Thermometer 12 inch
(C) Home made wort Chiller 3/8inch ID copper tubing 20 foot long with 20 foot clear tubing
(D) Blow off tube, regular plastic tube that fits in grommet of Fermenting Bucket Top (Item E)
(E) 7.9 gallon fermenting bucket (no spigot)
(F) Extra long plastic spoon
(G) Sanitizer solution (Sparkle Brite 2 lbs)
(H) Awesome stainless steel Measuring spoons I overpaid for but love (Bed Bath and Beyond) finding a 1/8 tsp spoon is hard for some reason
(I) Funnel (with a removable screen)
(J) 1 gallon glass jug
(K) Wine thief that doubles as a Hydrometer sight glass
( L) Hydrometer to measure specific gravity. Pro tip if you are a first timer.) They are cheap buy two you will break it if you breathe on it wrong.)
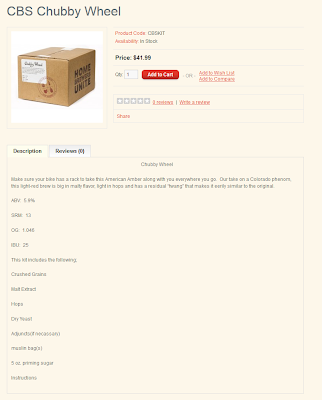
The Kit I was working with is Cleveland Brew Shop "Chubby Wheel" It is a part grain part extract American Amber Ale.
Here is the insides of the kit. I have already put the grains in the muslin bag and they are in the box ready to be put in the water.
First step is sanitation. I use Sparkle Brite which I learned from wine-making. It is something you will want to wash off after sanitizing. It is some bad stuff not as simple as Star-San but I like it. I haven't had any sanitation issues since I started in wine-making and beer making. It works it is cost efficient as well. Do sanitation however you want but do it well.
1 TSP gets added to a 1 gallon jug of hot water.
I add the Sparkle Brite then fill the jug up to the top with hot water and shake until the grains are gone. I put this into the fermentation bucket and wash that down with a beer making only sponge. I do the same with all the tools I use for the beer making process. Then I hit it with the kitchen sprayer and clean it off. When I run out I might switch to Star San but I have a ton of this stuff left and it works pretty well from what I have seen.
Next up per the kit is 2 gallons of water to 150 degrees. It gets there pretty fast and buying that foot long thermometer is worth every penny as you can see here.
When it hits 155 turn off the heat and drop the grain bag in.
As per the directions I get a hot pot of water and drop the extracts into them when I drop the grain bag in the kettle. It makes the extract flow better. I still wind up using a sterlized spatula to pull the grain out of the container at the end.
After the grains steep for 30 minutes you take one gallon and pour it over the grain bag elevated over the pot. You are then left with 3 gallons of wort in the brew kettle.
next up the boil. get it to 212 degrees F and you will get a nice rolling boil.
Add the extracts that you had in the pot of hot water.
Next I divide up the hops according to the Hops schedule.
Add the hop according to the schedule.
I have a whiteboard behind my stove so it make a convenient place for notes.
After the boil it is time to chill it down to below 70 degrees. The faster you do this the better. I made a homemade wort chiller which honestly works fast enough. Ive used this 3 times and each time it never took more than 8 minutes to chill the wort. All this wort chiller is is 3/8 inch copper tubing that is 20 foot long. The design is simple with a tubing bender.
Overhead shot of it already way lower than 212 degrees just from putting the wort chiller in.
No need to waste the water. Already pre-heated water easily pours right ito the hot tub. Since the water is in a sealed wort chiller the water is perfectly clean.
With it being in the 20s outside you can see the time stamp on the pictures. It took 5 minutes 40 seconds to chill the wort from a boil to sub 70 degrees. If the magic number was 30 minutes to cool the wort, this system is close to perfect.
From here I put the wort into the fermenter, ripped open the yeast packet and closed the lid tightly.
I didnt take a picture of it yet (I will update when I do)
I took the blow off tube and put it in the lid of the bucket and then took the other end and stuck it in that gallon jug of sanitizer from before.
It looks something like this.
That tubing IS going to get brown foam and it will go into the water. This is to be expected and is perfectly normal.
You are now done for 2 weeks. Put it somewhere so it can be at room temperature 65-75 and let it sit. Fermentation should start in about 12 hours and be VERY active for about 3 days.


